
For this bumper release, Rōpū kohinga has detailed some of the most high-impact features and fixes available to libraries upon upgrading to Koha 22.11.
Read the full Koha 21.11 release notes.(external link)
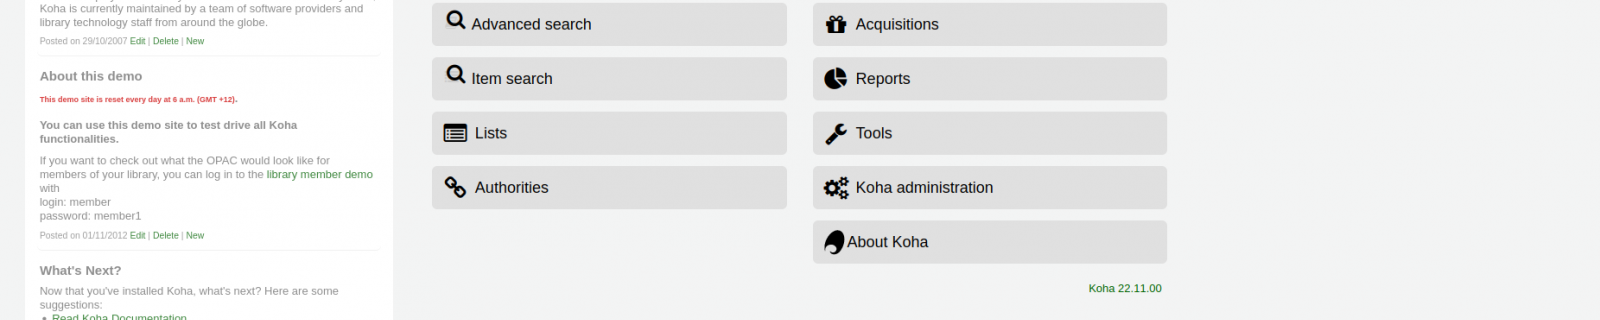
If you'd like to check out the new version as you read along, visit the Koha demo site.(external link)
Design
New design for staff interface [30952(external link)]
An international team of developers, designers and end-users (librarians) have given the Koha staff client a makeover! Librarians will notice right away that the staff interface looks more modern, along with usability improvements that make Koha more accessible. A major benefit of open source projects like Koha is that there is a lot of input from the librarian end-users on changes like this.
The changes include:
- The colour scheme has changed to a grey background and green highlights.
- When you hover over most buttons they change from grey to green. Shadows around the buttons have also been removed to move to a more modern flat design approach, as favoured by Google.
- The most important button on a page is often coloured yellow. For example, the 'Check out' button on a patrons account. This is to make it stand out more.

Patron account page with the ‘checkout’ button is coloured yellow, to make it stand out as the most important button on that page.
- The header is more compact and stretches the full width of the page.
- The main searchbar in the header no longer has tabs below it to perform different functions (Check out, check in, renew, Search patrons, Search catalogue).
Instead, these function buttons are to the right of the search bar - each with a logo and text label to make for better accessibility.
So, for example, if you wanted to search for a patron you would click on the 'Search patrons' button (underlined (selected) in below screenshot) and then start typing their name into the search input field.

New Koha staff client search bar with the ‘Search patrons’ button selected and the start of the name ‘alex’ entered into the search bar.
Cataloguing
Allow storing item values as a template for creating new items [24606(external link)]
Cataloguers can now create a template of pre-set values for items. A template can be applied on a case-by-case basis when cataloguing new items or a cataloguer can choose to globally apply the template when creating all new items during their current logged-in session.
How to create a template
Step 1) Search for a bibliographic record
Step 2) Click to create a new item
Step 3) In the item editor form input values that you would like to be in the template
Step 4) Rather than clicking 'Add item' click 'Save as template'.
Step 5) A new 'Save template' heading and fields appear below the item editor form (highlighted yellow in the below screenshot). Give the template a name, choose to make it available to other cataloguers by clicking the 'Share template' check box, and click 'Save'

ave template heading and fields highlighted yellow below the ‘Add item’ form.
How to apply the template when cataloguing new items?
Step 1) Search for a bibliographic record
Step 2) Click to create a new item
Step 3) If you already have access to a template (because you created it, or someone else shared a template) then above the item editor form you should see a dropdown where you can choose a template to be applied to the item (highlighted yellow in the below screenshot).
Step 4) After selecting the template you want to apply from the dropdown click 'Apply template' (highlighted yellow in the below screenshot) and the template values you set will populate the item editor form
Step 5) To automatically apply the template when creating items on any bibliographic record you can click the 'For session' checkbox (highlighted yellow in the below screenshot). This will only last during your current logged-in session.

Template dropdown,’Apply template’ button and ‘For session’ checkbox highlighted yellow above a empty ‘Add item’ form.
This feature bridges the gap in previous Koha behavour, in that cataloguers can now flexibly choose when pre-defined values are automatically added to new item records.
A couple of other neat aspects of this new feature are that templates can be shared with other Koha staff accounts in a read-only format, and in order to allow any Koha staff account to edit a shared template the manage_item_editor_templates sub-permission needs to be enabled on their Koha patron account.
Holds
Add the ability to group items for records [24857(external link)] and Add the ability to place item group level holds [24860(external link)]
Libraries can now shift related items into separate groups under a single bibliographic record. Once item groups are set-up it is possible (if enabled) for borrowers to place holds on just the items within a group.
Why would libraries want to group items together under a bibliographic record?
Until now when borrowers placed holds they had had two options: either request a specific item or request which item is next available on the bibliographic record.
However, sometimes borrowers are only interested in requesting from a subset of items attached to a bibliographic record. They had no means of doing that.
This enhancement addresses that need. Libraries can now add item groups to a subscription bibliographic record.
For example, there may be separate requestable groups for serial items from 2020, 2021, and 2022. Borrowers only interested in seeing serial items from 2021 could just place a hold on that group, and the next available 2021 item would fill their hold.
To group items and make those item groups requestable libraries must:
1) Enable the new EnableItemGroups and EnableItemGroupHolds system preferences
2) Go to a bibliographic record, click on the 'Item groups' tab
3) Select 'New item group'
4) Give the group a name and choose it's display order (define the order in which it should be displayed in relation to other item groups)
5) Click back to the 'Holdings' tab, select the checkbox of all the items to be added to the group and click 'Add/move to item group' link
6) When borrowers click to place a hold they now have a dropdown where they can choose to 'Request specific item group' (see highlighted yellow in the below screenshot)

Highlighted yellow ‘Request specific item group’ dropdown with ‘2021’ group selected on OPAC reserve page
Note: Whilst it's possible to request item groups in the OPAC, it doesn't currently display the group to which each item belongs to, as the staff client does (see highlighted yellow ‘Item group’ column in the below screenshot).
The display of which item group each item belongs to might be added to the OPAC in the future if the item group functionality proves to be popular.
Authentication
Add a generic OAuth2/OIDC client implementation [31378(external link)]
Setting up Single Sign On (SSO) authentication in Koha is now easier than ever.
There are different protocols (agreed set of rules) for implementing SSO. Traditionally, the Koha community has used SAML protocol SSO. However, with this enhancement, it is now easier than ever to implement SSO using the OAuth and OIDC (OpenIDConnect) protocols.
Koha is no longer tied to using Google as the Identity Provider (application storing user information), it's now possible to integrate with other identity providers, and not just one at a time.
How is this helpful to libraries?
1) First, using the 'Administration' > 'Identity providers' > ‘New identity provider’ staff client page library IT departments can now configure much of their SSO set-up themselves.

‘New identity provider’ page with a code, description, configuration and mapping fields containing content. The ‘Protocol’ dropdown set to ‘OIDC’ and the ‘Matchpoint’ dropdown set to ‘Email’
After saving their SSO configurations, they just need to restart services, or request that their Koha vendor do so. Then the library should be able to start testing by clicking on the buttons linking to each identity provider login page.
2) Libraries using OAuth and OIDC can now configure multiple identity providers to be used simultaneously. What this means is a library whose IT department is using OAuth and OIDC can now easily allow both users within their organisation and external vendors outside of their organisation to be able to SSO authenticate to Koha.
All the library IT department need to do is set-up multiple entries in the 'Identity providers' page for each domain and then ask their Koha vendor to restart services.
Add the option to require 2FA set-up on first staff login [30588(external link)]
Two factor authentication is increasingly common in the digital world. Essentially, it requires users to not just login using something they know (a password), but also something they own (a phone running a two factor authentication app that provides a code upon logging in).
This makes it much harder for accounts to be compromised. Koha had introduced this two factor functionality as an optional way for librarians to log into the staff client in 22.05.
The Koha community has expanded that functionality in 22.11. Now it is possible to enforce that librarians use two factor authentication. If libraries set the TwoFactorAuthentication system preference to the new 'enforce' option then when librarians who have not registered with a two factor app try to log into the staff client they will be enforced to register before they can log in (see below screenshot).

Acquisitions
Add a new English 1 page layout to export a basket as PDF [31257(external link)]
This feature was developed by Catalyst and upstreamed to the Koha project, sponsored by Pymble Ladies College of Sydney.
Previously, it was only possible to export basket groups in two or three-page PDF documents, however, if you want basket information in a smaller document that looks more like an invoice you can do that thanks to this enhancement.
Simply set the ‘OrderPdfFormat’ system preference to ‘English 1-page’.

The OrderPdfFormat system preference with the ‘English 1-page’ option selected
This puts the library, vendor and order information all on one page – as the below screenshot shows.

1 page PDF export of a basket showing library, vendor and order information
Patrons
Add preferred pronoun field to patron record [10950(external link)]
Koha 22.11 Rosalie illustrates that the Koha community is working towards making Koha more inclusive.
Now borrowers can input their preferred pronoun on their Koha patron account. This can either be done by the borrowers themselves via the OPAC, or by librarians editing a borrower's account on the staff client.

New ‘Pronoun’ field highlighted yellow in the OPAC personal details page.
After submitting their pronoun into a free text field on their patron account it's then displayed prominently on the left side of the patron account pages (highlighted yellow in the below screenshot of the staff client).

Patrons preferred pronoun highlighted yellow on their patron page in the staff client.
Make patron restrictions user definable [23681(external link)]
The Koha community loves giving libraries the freedom to customise their OPAC and staff interface. This release is no exception!
Libraries can now create custom patron restrictions relevant to their own library. Rather than being limited to applying a DISCHARGE, MANUAL, OVERDUES or SUSPENSION restriction to patrons libraries can now define their own types of restrictions.
How to create a custom restriction
Step 1) Go to Administration > Patrons and circulation > Patron restrictions
Step 2) Four default restrictions will be displayed in the table - these cannot be deleted as they may already be applied to patrons.
Step 3) To create a new restriction click the 'New restriction' link - Note: This link can be hard to find, but it is a grey link above the 'Patron restrictions' heading (highlighted yellow in the below screenshot)

New restriction’ link highlighted yellow above the ‘Patron restrictions’ header.
Step 4) Save a new restriction after inputting a code and description
Step 5) To be able to use your new restrictions you need to enable the new PatronRestrictionTypes system preference

PatronRestrictionTypes system preference with the ‘Allow’ option selected.
How to apply your restriction?
Step 1) Go to the 'Check out' section of a patron's account
Step 2) Click on the 'Restrictions' tab and click 'Add manual restriction'
Step 3) Select your custom restriction from the 'Type' dropdown (highlighted yellow in the below screenshot).

‘Type’ dropdown highlighted yellow with the custom ‘Lost too many items’ option selected.
Note: You will notice that only one of the 4 default restriction types, 'Manual', is in the dropdown. That is because the other 3 types are only available to be automatically applied by automated jobs.
Email library when new patrons self register [23538(external link)]
This feature was developed and sponsored by Catalyst.
This handy new feature helps libraries to manage new patron self-registrations in the OPAC.
Libraries can now choose to be emailed (or not) when new patrons self register in the OPAC using the EmailPatronRegistrations system preference.
This system preference can be configured in 4 different ways:
- Not to send an email to the library
- To send an email to the branch email address the new patron has registered for
- To send an email to whatever address is defined in the existing KohaAdminEmailAddress system preference
- To send emails to a custom address defined in the separate EmailAddressForPatronRegistrations system preference.

‘EmailPatronRegistrations’ syspref highlighted with the ‘email address of library’ dropdown option selected. The ‘EmailAddressForPatronRegistrations’ input box remains empty.
The email itself contains summarised patron information that was in the patron’s registration so the library staff can, for example, search for this new Koha patron account easily and change their temporary patron category (set by the existing PatronSelfRegistrationDefaultCategory system preference) to a more relevant category.
Electronic Resource Management
Electronic resource management (ERM) [32030(external link)]
The new ERM module allows libraries to track and manage their electronic resources including agreements, licenses and e-holdings. We will write a dedicated blog post on this large, new module soon. For now, here is a quick overview of the configuration for the Koha ERM:
How to enable the ERM module
1) Go to: Administration > Global system preferences > E-resource management. You’ll notice there are four ERM system preferences:

FourERM system preferences in the ‘E-resource management preferences’ page
2) Enable the new 'ERMModule' system preference – the other three ERM system preferences are if you want to integrate with EBSCO by entering your customer ID, and API key. If you don’t use EBSCO you can set ‘ERMProviders’ system preference to ‘Local’ for using local package holdings.
3) Ensure staff that need to be able to use the ERM module have the ‘erm’ permission enabled (highlighted yellow in the below screenshot).

‘Manage the electronic resources module (erm)’ permission selected for a patron
4) As a patron with the ‘erm’ permission enabled you should see the 'E-resource management' module link on the staff client home page – see highlighted yellow in the below screenshot.

‘E-Resource management’ module link highlighted yellow in the staff client home page
5) Using the links in the left hand pane of the page you can create and manage agreements, licenses and eHoldings (highlighted yellow in the below screenshot). Meanwhile, the search bar at the top of the page enables you to find agreements, packages and titles.

Links for managing ‘Agreements’, ‘Licenses’ and ‘eHoldings’ highlighted yellow. Meanwhile the green searchbar at the top of the page enables searching for agreements, packages and titles.
What are agreements, licenses and eHoldings?
- Agreements: Libraries can add an agreement for each electronic resource they can access. This allows them to keep track of the agreement and it’s status, and agreements can even be linked with vendors (created in the Koha acquisitions module).
- Licenses: Libraries should use the ERM modules licenses feature to record what they can do with the electronic resources they pay for. The ERM Licenses feature enables libraries to upload license documents, and keep track on when they start, expire and need renewing.
- eHoldings: This feature enables libraries to manage packages (collection of titles) and titles that they have purchased from a database provider (e.g. EBSCO) or store locally.
When EBSCO is selected in the ‘ERMProviders’ system preference it will appear under eHoldings. Also, if a library has entered their EBSCO customer ID and API key into the ERMProviderEbscoCustomerID and ERMProviderEbscoApiKey system preferences then it is possible to use the eHoldings feature to search EBSCO holdings from within Koha.
To learn more about the ERM module take a look at this presentation(external link) from PTFS Europe.
Pages
Add CMS feature [15326(external link)]
Catalyst developed this feature for Koha with sponsorship from Region Halland, Horowhenua Libraries Trust and Chartered Accountants Australia and New Zealand.
This game-changing feature enables library staff to further customise their Koha instances by creating content-managable pages on the staff client and OPAC without needing any knowledge of HTML or CSS. This is perfect for the library that needs Koha to double as a website for the library.
Using the new Pages tool (Tools > Additional tools > Pages) when a custom page is created a link to that page is generated. This link can then be plugged into the appropriate news item or HTML customisation allowing users to access that page in the staff client or OPAC.

Pages’ link and description highlighted yellow under ‘Additional tools’ on the ‘Tools’ page.
Custom pages inherit the styling, headers, footers and other custom content from whichever interface the library creates them for (either OPAC or staff client). They also work in the same way as the News and HTML customisations tools do meaning it's possible to use two types of editors for constructing your custom page:
- Text editor - if you want to write HTML code yourself.
- WYSIWYG editor - so you can insert images, links, tables without having to write any HTML code.
You can choose the editor you want used by default by configuring the AdditionalContentsEditor system preference.
Also, you can ensure the custom pages are fully translated by entering page content for every language translation you have installed on your Koha instance. The correct content will be displayed depending on which language users are viewing Koha in.
To create a custom page go to ‘Tools’ > ‘Additional tools’ > ‘Pages’ > ‘New entry’ then:
1) Choose the 'Display location' - indicate if you want the custom page accessed from the staff client or the OPAC.
2) Choose the 'Library' - If available in the OPAC do you want the page to be limited to borrowers from a specific home library. If available from the staff client, do you want the page to be limited to staff logged into a specific library.
3) Set the 'Publication date' - if you want the custom page only accessible from a date in the future then set that date in this field
4) Set 'Expiration date' - Choose the date you want the custom page to no longer be accessible.
5) Ignore 'Appear in position' - this is not relevant to the Pages tool (it's used by News items and HTML customisations) so it can be ignored
6) Enter a title and content for each language installed on your Koha instance
7) Click 'Save'

Form for adding a new page. Page configured to display on the OPAC between 01/01/2023 and 31/12/2023. The Page is titled ‘Recommended reading for 2023’ and it contains tables of titles and authors
8) After saving, a table of pages appears, copy the link from the 'Page URL' column (highlighted yellow in below screenshot) and add into the appropriate News item or HTML customisation. Then users can access the new page.

Generated links for the custom page highlighted yellow in the ‘Page URL’ column.
9) Once users click on the link from the OPAC News item or HTML customisation they will see the custom page content displayed with the appropriate styling, headers, footers and other custom content for the interface it’s being viewed on, as you can see in the below screenshot.

Custom ‘Recommended reading for 2023’ page content, including tables of titles and authors displaying with the OPAC styling, header, footer and additional contents (‘OpacNav’ HTML customisation).
Purchase suggestions
Add the ability to limit purchase suggestions by patron category [31333(external link)]
This feature was developed and sponsored by Catalyst.
This new feature enables libraries to select a limit to which patron categories can submit purchase suggestions.
Previously, libraries had a binary choice: either allow all patron categories to submit purchase suggestions, or none (depending on the setting of the 'suggestion' system preference).
The feature works by selecting the ‘suggestionPatronCategoryExceptions’ system preference and which patron categories may not make purchase suggestions.

The ‘Inter-Library Loan’ and ‘New Registrations’ patron categories are selected for the highlighted ’suggestionPatronCategoryExceptions’ system preference.
This is a useful enhancement for those libraries that need to provide a more comprehensive service to some user segments as compared to others.
Fines
Possibility to mark processing fee by default refund when item is found [23012(external link)]
This feature was developed for Koha by Catalyst, sponsored by Auckland University of Technology.
In previous versions of Koha when a lost item was returned it was possible to configure Koha to refund the patron the lost item replacement fee, but not to refund the processing fee. Meaning, patrons could still be left with a fine to pay even though they returned their item. Auckland University of Technology wanted to eliminate this edge-case from Koha.
Libraries can now configure Koha to do one of three things with the processing fee: to refund, refund if unpaid or keep the processing fee when a lost item is returned.
How to configure what happens to the processing fee when a lost item is returned:
Step 1) Go to Administration > Patrons and circulation > Circulation and fine rules
Step 2) Under the 'Default lost item fee refund on return policy' you'll notice there is a new 'Refund lost item processing fee' dropdown where you can define what happens (highlighted yellow in the below screenshot).

New ‘Refund lost item processing fee’ dropdown selected with three options: ‘Refund lost item processing charge’ (selected), ‘Refund lost item processing charge (only if unpaid)’, and ‘Leave lost item processing charge’).
Recalls
Show waiting recalls in patron account on checkouts tab [30905(external link)]
This feature was developed and sponsored by Catalyst.
The feature makes it easier for librarians to see when patrons have a recall waiting for pick-up. Like the existing holds functionality, any recalls that are awaiting pick-up will now be more visible under 'Recalls waiting here' on a patrons account in the staff client (highlighted yellow in the below screenshot).

Recalls waiting here’ section of a patron account in the staff client highlighted yellow showing that the patron has 1 recalls awaiting pickup.
Lists
Option to keep public or shared list when deleting patron [11889(external link)] and Add a designated owner for shared and public lists at patron deletion [30933(external link)]
The fix for Bug 11889 was sponsored by Catalyst.
When that key staff member who manages all your lists leaves your library it creates a conundrum. If you delete their patron account, as part of their offboarding, then all the lists they curated would disappear with it.
Now using the new ListOwnershipUponPatronDeletion and ListOwnerDesignated system preferences libraries can choose if public and shared lists should be deleted when the list owner’s patron account is deleted.
The choices for the ListOwnershipUponPatronDeletion system preference are either:
- delete the lists
- change the ownership of the lists.
If ‘Change the ownership of the lists’ is selected then libraries can choose to define which patron account should inherit the list by writing their borrowernumber in the ListOwnerDesignated system preference (this is set to borrowernumber 1 in the below screenshot). If this system preference is left blank then the staff member deleting the patron account will inherit the list.
Allow to change owner of public or shared list [25498(external link)]
It’s not just possible to change the owner of a list when the current owner’s account is deleted, it can be done any time thanks to this enhancement!
Now if a librarian's patron account has the edit_public_lists sub-permission enabled then when viewing public lists in the staff client they will see a 'Transfer' button (highlighted yellow in the below screenshot).

‘Transfer’ button highlighted yellow for ‘My research’ public list
Clicking that 'Transfer' button will load a form where they can search for and select a new patron account to transfer ownership of the list to.

Transfer ownership’ form with searchbox to find a patron account to transfer list ownership to.
Dedication
The Koha Community has dedicated the release of Koha 22.11 to Rosalie Blake.
Rosalie was the Head Librarian at Horowhenua Library Trust when Koha was started and without her, Koha would not exist. She was an inspiring leader and innovator and took the risk of her career entrusting Chris, Joanne, Rachel and Simon to deliver the original project that became the international sensation we all know and love.
She was also a practising Justice of the Peace, a stalwart of the Levin Pottery Club and much-loved mother of Simon and Jeremy, and grandmother of Ben, Toby, Anna, Charlotte and Billy.
Catalyst, in particular, Rōpū kohinga, sends their condolences to Rosalie's family and friends.
Read more about the 918 features, enhancements, and security and bug fixes of the 22.11 Release on the Koha Community website(external link).
Written by Alex Buckley, Rōpū kohinga Implementation Lead and Aleisha Amohia, Rōpū kohingaTechnical Lead.
Catalyst Koha
If you have any questions or comments about this News item, or would like some support with your Koha instance, you are welcome to contact us.